Kitchen-Counter Polymers - Synthesizing Thermoplastic Starch (TPS) Bioplastics
Series: Advanced Materials | Difficulty: Beginner | Estimated Time: 30 Minutes (Active) + 24-48 Hours (Curing)
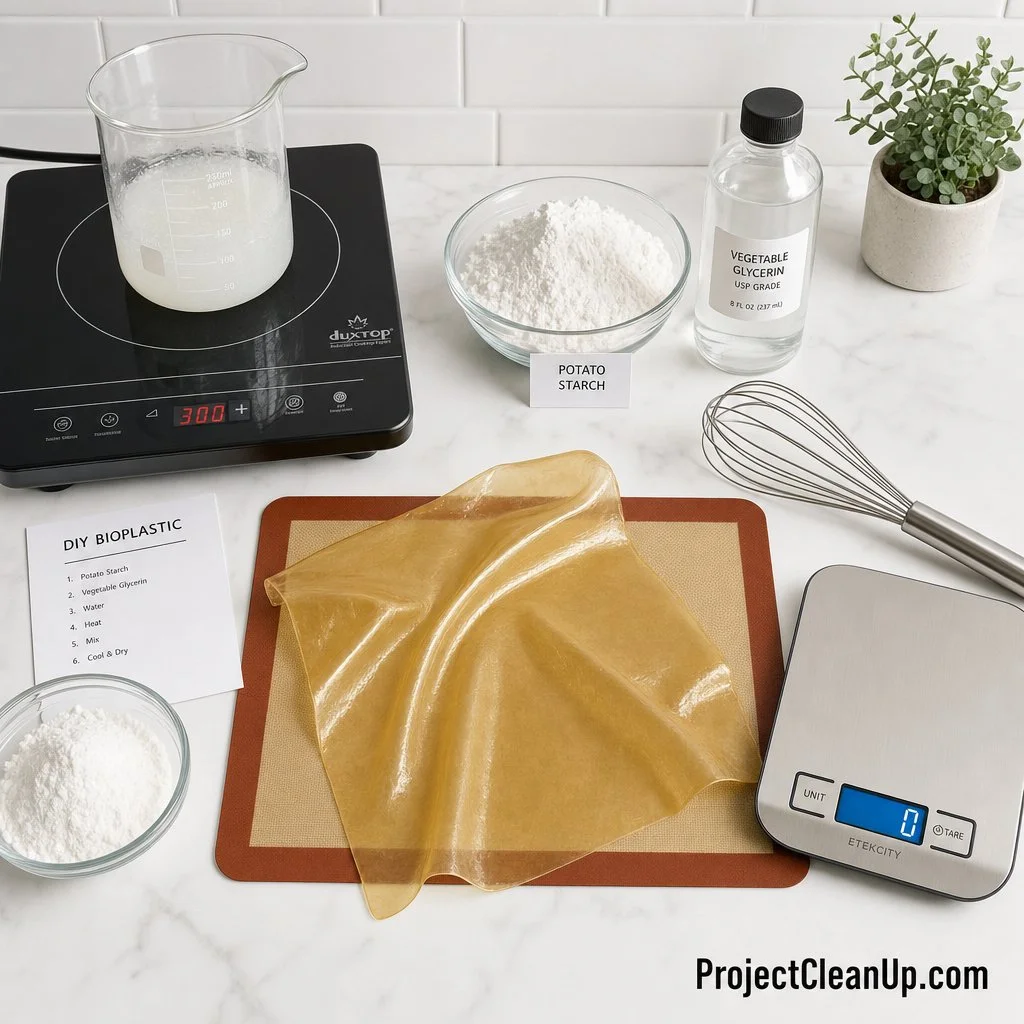
Introduction
The modern world is addicted to petroleum-derived polymers—plastics that take centuries to break down, shedding microplastics into the ecosystem every step of the way. But the fundamental science of polymers isn't restricted to massive refineries; it exists right in your pantry.
In this practical module, we are going to synthesize Thermoplastic Starch (TPS). This is a legitimate, flexible bioplastic made entirely from organic, biodegradable materials: starch, water, an acid, and a plasticizer.
By manipulating the molecular structure of ordinary potato starch, we will disrupt its rigid crystalline form and force it into an amorphous, flexible state. This isn’t just a craft project; it is an exercise in applied chemistry and polymer synthesis, executed safely on your kitchen counter.
The Chemistry: How We Hack Starch
Starch is a polysaccharide (a long chain of glucose molecules). It exists in nature primarily as a mixture of two distinct structures:
Amylose: Linear, unbranched chains. This gives starch its strength.
Amylopectin: Highly branched chains. This makes starch bulky and rigid.
In its natural state, starch is brittle and crystalline. To turn it into a usable plastic, we must apply a process called plasticization.
Here is how our chemical recipe alters the molecular structure:
The Acid (Vinegar/Acetic Acid): The weak acid acts as a catalyst. It breaks down the highly branched amylopectin molecules into shorter, straighter chains, increasing the ratio of linear amylose. This fundamentally alters the structure, making the resulting material less brittle and more uniform.
The Heat and Water: When heated in water, the starch granules absorb the liquid, swell, and burst—a process called gelatinization. This destroys the crystalline structure of the starch, turning it into a disordered, amorphous gel.
The Plasticizer (Vegetable Glycerin): This is the crucial step. Without glycerin, the gelatinized starch would simply dry into a hard, brittle sheet. Glycerin ($C_3H_8O_3$) is a small molecule that embeds itself between the long starch polymer chains. It acts as a molecular lubricant, preventing the chains from packing tightly together again. This increased free volume allows the chains to slide past one another, granting the final bioplastic its flexibility.
Safety Framework: R.A.M.P.
Even on the kitchen counter, adopting a professional laboratory mindset ensures safety and consistency. We utilize the R.A.M.P. framework:
Recognize hazards: We are working with a heating element and a liquid that will become thick, sticky, and hot. Hot syrup can cause significant burns if it makes contact with skin.
Assess risks: The primary risk is thermal burns from the hot starch mixture or the heating element.
Minimize risks: Do not leave the heat source unattended. Have potholders or heat-resistant gloves ready. Wear long sleeves and standard safety glasses. Use a whisk with a long handle to maintain distance from the hot mixture.
Prepare for emergencies: If hot bioplastic touches the skin, immediately run cold water over the affected area for several minutes. Do not attempt to peel the plastic off while it is hot, as this can tear the skin.
Materials & Equipment
Chemicals (The Reactants):
Potato Starch: $10\text{ grams}$ ($\approx 1\text{ tablespoon}$). Note: Cornstarch works, but potato starch generally yields a clearer, more flexible film due to a higher amylose content.
Distilled Water: $60\text{ mL}$ ($\approx 4\text{ tablespoons}$). Distilled water prevents mineral impurities from affecting polymer clarity.
White Vinegar (5% Acetic Acid): $5\text{ mL}$ ($\approx 1\text{ teaspoon}$).
Vegetable Glycerin: $5\text{ mL}$ ($\approx 1\text{ teaspoon}$). Available at most pharmacies or online.
Equipment:
A small stainless steel or glass saucepan (a non-stick pan can be used, but stainless provides better visual feedback).
A portable induction burner or a standard stovetop.
A silicone spatula or a small wire whisk.
A silicone baking mat or a smooth pane of glass (for casting the plastic).
A digital kitchen scale (highly recommended for precision).
The Procedure: Synthesizing the Polymer
Phase 1: Preparation and Mixing
Measure the Solute: Weigh exactly $10\text{ grams}$ of potato starch into your saucepan (2 and 1/2 teaspoons or roughly 3/4 to 5/6 of a tablespoon, 1 tablespoon is fine).
Add the Solvent and Catalyst: Add $60\text{ mL}$ of distilled water and $5\text{ mL}$ of white vinegar to the starch.
Introduce the Plasticizer: Add $5\text{ mL}$ of vegetable glycerin.
Initial Homogenization: Before turning on the heat, whisk the mixture thoroughly. Starch does not dissolve in cold water; it suspends. You must break up all clumps to create a uniform, milky suspension.
Phase 2: Gelatinization (The Heating Phase)
Apply Heat: Place the saucepan on your burner over medium-low heat.
Continuous Agitation: Begin stirring continuously with your silicone spatula or whisk. Constant motion is required to prevent the starch from settling and burning on the bottom of the pan.
Observe the Phase Change: As the mixture heats, the water will begin to penetrate the starch granules.
Observation 1: The liquid will begin to thicken.
Observation 2: The milky white suspension will rapidly transition into a translucent, sticky gel. This is the visual confirmation of gelatinization—the crystalline structure has collapsed.
Hold the Temperature: Once the mixture turns translucent and begins to bubble slightly, continue stirring over the heat for exactly 3 minutes. This ensures complete breakdown of the amylopectin and full incorporation of the glycerin. The consistency should resemble a thick, clear syrup or petroleum jelly.
Remove from Heat: Promptly remove the pan from the burner.
Phase 3: Casting and Curing
Cast the Film: While the polymer mixture is still hot and fluid, pour it directly onto your silicone baking mat or glass pane.
Spread Evenly: Use the silicone spatula to spread the mixture into a thin, even layer (approximately $1\text{-}2\text{ mm}$ thick). Try to work quickly to avoid introducing air bubbles as the mixture begins to cool and set.
The Curing Process: Place the mat in a warm, dry area with good airflow. The bioplastic must now undergo dehydration.
Wait: The curing process typically takes 24 to 48 hours, depending on ambient humidity. Do not attempt to peel it too early. You will know it is ready when the edges begin to curl slightly and the surface feels completely dry and smooth to the touch.
Demold: Carefully peel the cured bioplastic sheet away from the silicone mat.
Analysis and Experimentation
You have now synthesized a thermoplastic starch film. Examine your result. It should be flexible, slightly translucent, and possess a surprisingly high tensile strength.
Because this is an open-system material, it is sensitive to environmental factors (specifically water). Try these follow-up experiments:
The Biodegradation Test: Cut a small strip of your bioplastic and bury it in damp soil (or a vermicompost bin). Check it every week to observe the rate of biological degradation. Unlike polyethylene, it will vanish.
The Glycerin Variable: Run the synthesis again, but halve the amount of glycerin ($2.5\text{ mL}$). You will observe that the resulting plastic is significantly more brittle. Then try doubling the glycerin ($10\text{ mL}$) to see how it becomes overly tacky and weak. This demonstrates how critical precise plasticizer ratios are in polymer engineering.
The Solubility Test: Submerge a piece of your bioplastic in a glass of water. Because we have not chemically cross-linked the polymer with a secondary agent, TPS remains hydrophilic (water-loving) and will eventually swell and dissolve.
By mastering this foundational synthesis, you are directly interacting with the physical properties of advanced, sustainable materials. You have taken a crop (the potato) and, using applied chemistry, re-engineered its molecular structure to serve a new function.